Hello Sandwiches!
With the festive season coming up I thought I'd share a tutorial from the Hello Sandwich Gift Wrapping Zine. It's a simple way to turn wrapping paper, kraft paper or even a pre-loved envelope into an original paper gift bag.
HOW TO MAKE
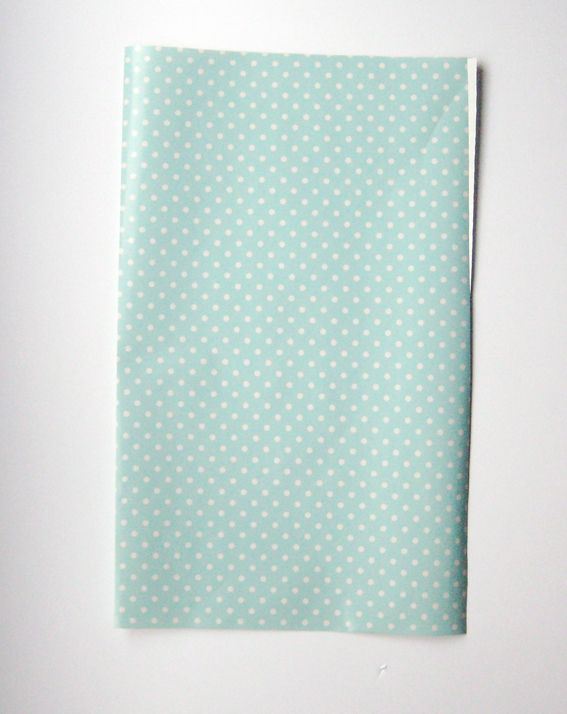
1. Take a sheet of paper or wrapping paper approximately double the size that you desire your bag and fold it in half horizontally.
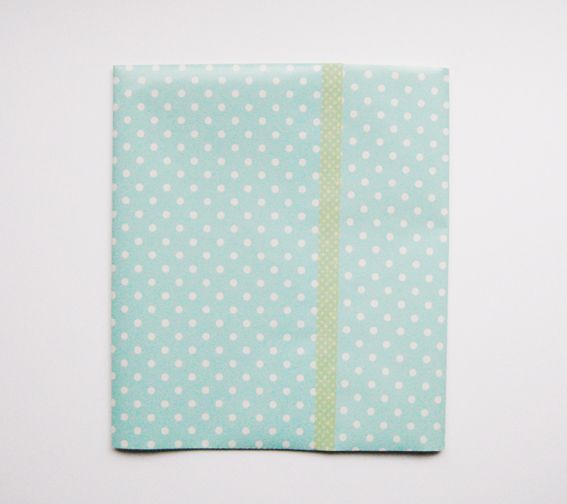
2. Fold the sides horizontally inwards and slot one side into the other. Tape together with washi tape.
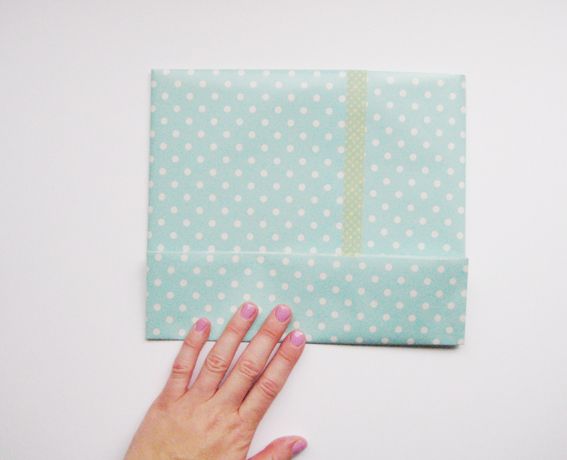
3. Fold the base of your bag in and press down forming a crease.
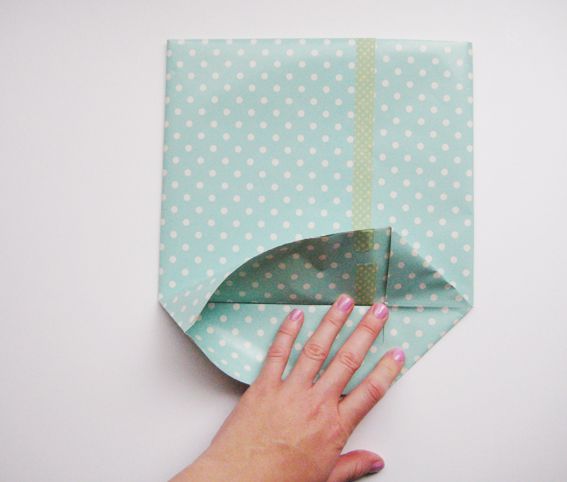
4. Open out one side of the base by flattening the corners into a triangle shape.
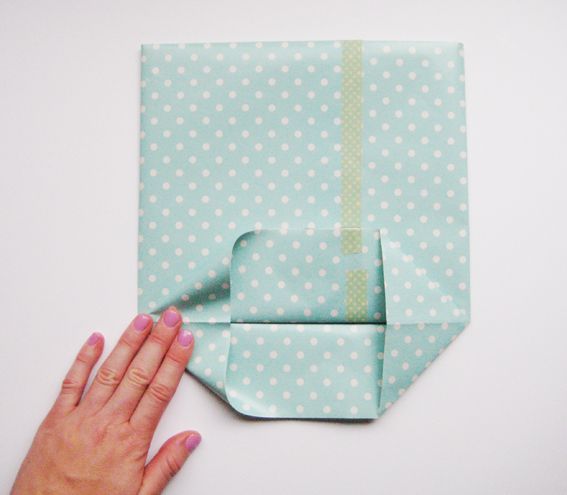
5. Repeat step 4 with the other side of your base.
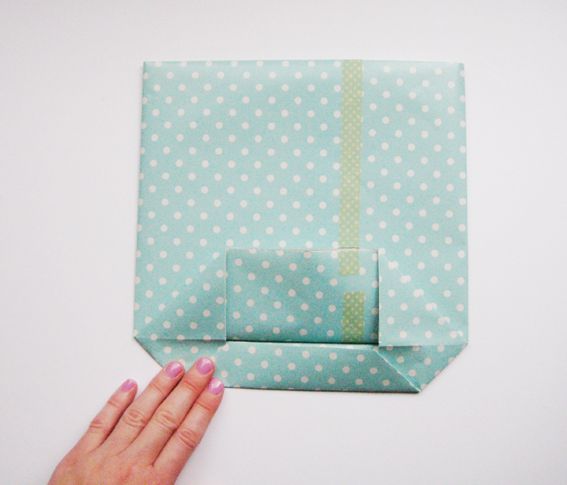
6. Fold your base inwards as shown in the picture.
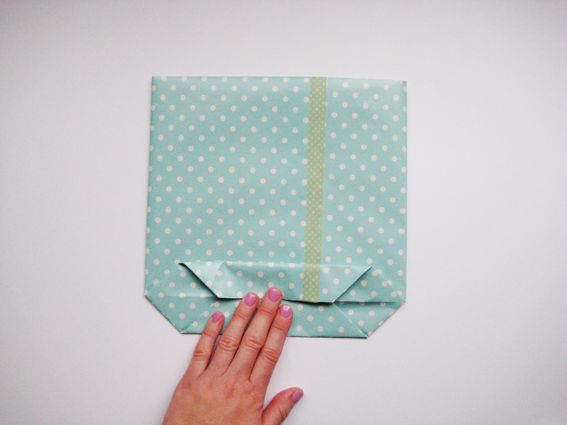
7. Repeat step 6 on the other side of the base.
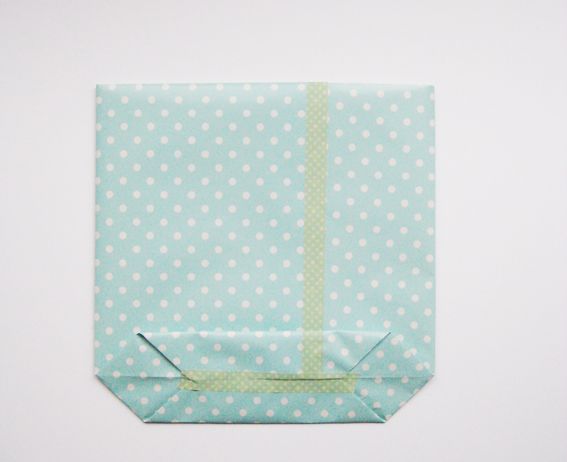
8. Tape together the base using washi tape.
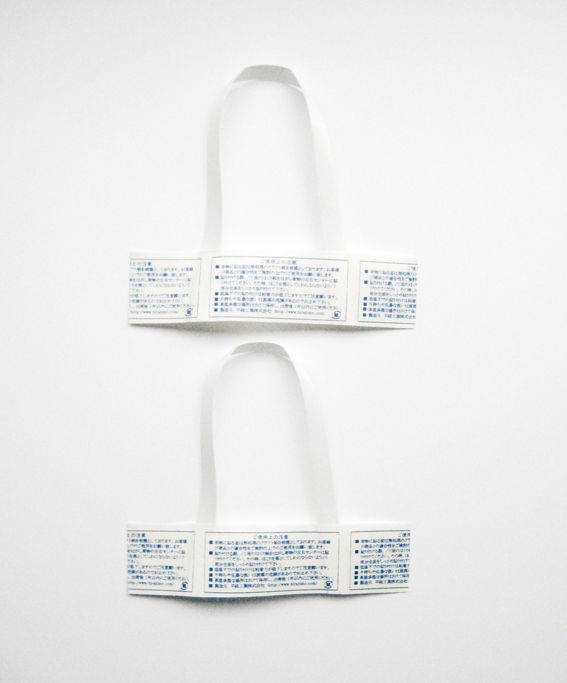
9. Take store bought handles or use the handles off another paper shop bag.
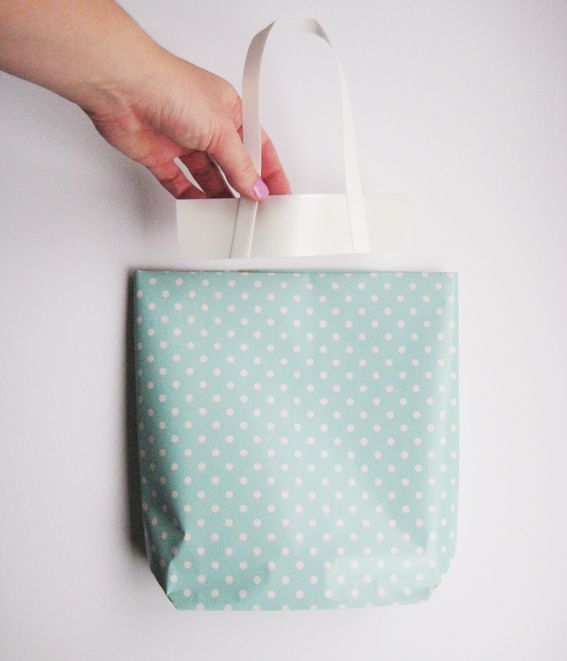
10. Tape your handles to the inside of your gift bag and your bag is ready to go!
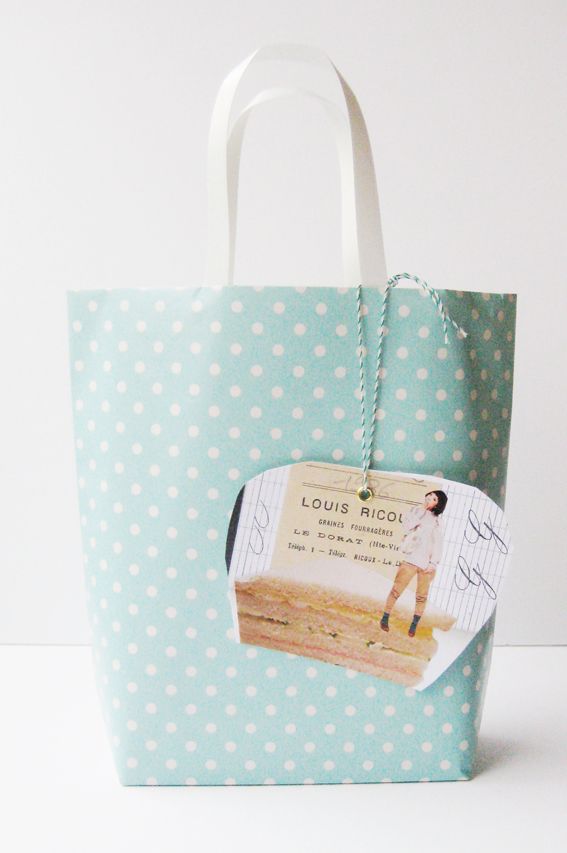
You could also get creative with mt tape and decorate your bag like this one I made after a trip to the mt expo!

If you'd like to make some more creative gift wrapping projects you can get the Hello Sandwich Gift Wrapping Zine here for $10AUD. Happy Wrapping Sandwiches!
Love Love
Hello Sandwich
xoxo

Ah, this is such a good idea! I'm giving out quite a few farewell presents this week, and have some wrapping paper left. Thanks for the tutorial! And please let us know if you ever restock the hard copy of the wrapping zine!
ReplyDeleteTHANK! IS SO CUTE!
ReplyDeleteThank you, this Saturday I will have gift wrapping/Xmas decorations workshops here in Krakow (PL), maybe I can share your idea with my "students", I really like what you are doing!
ReplyDeleteThis couldn't have come at a better time! I needed a gift bag to hang on a door and I didn't have anything that was the right size for my gift. I just made one (using a different technique to close the top), but it worked so well and looks so super cute (plus it fits in with all my other wrapped gifts). Thanks so much for posting this! I'll be making all of my gift bags from now on!
ReplyDeleteThis is a great idea! I'll try out definitely.
ReplyDeleteThanks a lot for sharing :)
Thank you! This is incredibly useful for the holiday season! <3
ReplyDeleteYou have a knack for making the most simple designs cute and lovely!
Your blog and projects are so charming, you've inspired me to try for a lighter (in color and openness) style with whatever I do next. Do I imagine it, or are Japanese papers just the best? Thank you.
ReplyDeleteThis bag looks beautiful! but I don't quite understand step two.... maybe i am a bit silly
ReplyDeleteCool idea! and cute for goodie bags.
ReplyDeleteKawaii! Great idea for xmas!
ReplyDeleteThis comment has been removed by a blog administrator.
ReplyDeleteso adorable!
ReplyDeletei need to find some handles.
Great idea, lovely result! And not to difficult to make, I think. Thanks for sharing :)
ReplyDeleteThis is just what I need as Christmas is nearing and I'm looking for wrapping ideas. I might do some fairy-inspired goodiebags with butterflies and stuff:
ReplyDeletehttp://oona-theothergirl.blogspot.com/2011/12/mischievous-creatures.html
Love it! :)
ReplyDeletesuch a cute idea
ReplyDeletewww.herpersona.blogspot.com
www.herpersona.blogspot.com
adorable!
ReplyDeletebesos*
Wow, this is incredible. really enjoy reading your blog. I have been making fabric bags to hold yarn for Christmas pressies. This project of your has inspired me to make venture into the world of paper crafting.
ReplyDeleteThank you!!!
ps beautiful beautiful blog!!!
http://ohmymamawolf.blogspot.com/
So cute! :D
ReplyDeleteThis is an adorable idea- so customisable! Hi from Oz, you're so lucky to be living in Japan! My weakness is Japanese linens- I love to sew. Happy to have stumbled across your blog- I look forward to following your adventures.
ReplyDeleteFor some reason I can't comment through my blogger account so if you'd like to say hi you can find me here: www.elegantpaws.blogspot.com
This is so fun and useful for the incoming holiday season! And easy to make. Especially to make s bunch of them with my kids. Thank you!
ReplyDeleteSuch wonderful papercrafts, I love your blog!
ReplyDeleteGuauuu!!
ReplyDeleteLove it! where do you get those handles?
ReplyDeleteThis is such a cute and easy idea! Thanks for sharing! ♥
ReplyDeleteit's gorgeous, I'd love to make it, but I agree with Sarah, I don't quite understand the 1st two instructions... could you clarify?
ReplyDeleteI love that! Where do you buy the handles?
ReplyDeletewow how super ... thank you for sharing this tip ... would you mind if I put it on my blog I will put a link back to your blog ... thank you once again ... happy crafting and love sandy xx
ReplyDeleteGreat tutorial...love both the bags! Attending a MT Expo WOW!!! I adore washi tape and would be like a kid in a candy store at an Expo for MT. I see some really wonderful tapes on the second bag you made. Will need to watch for some of them in 2012!
ReplyDeletethanks! so cute!
ReplyDeletelove this idea- great turorial also. I shared on my blog: http://rebooked.wordpress.com/
ReplyDeleteIt's great, thank you! I linked it on my own blog, of course with credits.
ReplyDeletehttp://kakukkbirodalom.blogspot.com/2011/12/ajandektaska.html
wow!! i love this tutorial!! ;o
ReplyDeleteand the lovely dotty paper :)
I think this is a brilliant. Gift bags can be so expensive, and this allows us to make our very own out of materials we have. I think I would reinforce the base of the bag by placing a rectangular piece of light weight cardboard cut to the size of the base. This would definitely be a little sturdier. Where can I find the cute string used on the aqua colored bag? I've seen it on other projects, but I have not seen it in the paper craft stores. Thanks so much for sharing a terrific idea.
ReplyDeleteI LOOOOOOOVE IT!!!
ReplyDeleteI´m In Love both your blog and your proyects. Thanks for sharing!!!
ReplyDeleteI follow from the Caribbean blue Island
Thanks for sharing this tutorial! It's such a great idea.
ReplyDeleteWhat a great idea and a great tutorial!
ReplyDeleteThank you so much for this amazing tutorial! I can't wait to give it a try! We featured it today on Fiesta Résistance! http://www.fiestaresistance.net/2012/07/diy-paper-gift-bag.html
ReplyDeleteSuper idea and looks super easy...
ReplyDeleteSo cute! such a great idea
ReplyDeleteSo cute
ReplyDeleteI think this is a brilliant. Gift bags can be so expensive, and this allows us to make our very own out of materials we have. i will try it for Gift Card envelopes.
ReplyDeleteThis is brilliant thank you.
ReplyDeleteWe are going to make ghost and ghoul bags using this method to make the bag today so thank you so much for sharing.
I have re-pinned it too.
This is great to do if you can get old wallpaper books from paint shops.
ReplyDeleteGreat idea!
ReplyDeleteI am gratified to catch a glimpse of your blog I conceptualize it . It is an fascinating blog its your gratefulness for capitulating and giving out with us. Gift paper bags
ReplyDeleteSuper Idea
ReplyDeletehi is cool idea and it easy to make.............
ReplyDeleteAdorable Gift Bag! Thanks to you that now I can make gift bags by myself :)
ReplyDeleteawesome...great idea
ReplyDeletewow, looks great!
ReplyDeletetoo simple, I love it!
ReplyDeleteWOW! I have made my own bags using a cereal or other size box as a template/mold but this looks about 100 times easier - and way cooler! Will give this a try this Christmas! Thanks for a great tutorial!
ReplyDeletethank you. I just made one out of plan computer paper. decorated it wit Christmas wrapping paper and I am going to put cookies in it. LOVE it.
ReplyDeleteThanks so much! I have some gifts for my daughter's teacher and no bags the right size for them, so this is perfect!! I can't wait to get started!!! :-D
ReplyDeleteVery clever and cost effective! My paper is white so I am going to hand paint them. Thanks!
ReplyDeleteWow! Thanks for sharing this idea. It's beautiful and very creative of you.
ReplyDeleteAdorable! I'm going to try it!
ReplyDeleteI really like the idea of making my own bags with Christmas coming up soon I better get started. Thanks so much.
ReplyDeleteOooh! Where was this last year when I needed it? I am so glad to find this this year though!
ReplyDeleteidk if my first comment went through, but I just wanted to say that this is definitely more easy to understand than the WikiHow page on making paper bags (with the 10-sec videos? yeah that one). should have gone here first!
ReplyDeleteThank you so much for this, and I hope you have an awesome rest of the year! xoxo
I just did this for Christmas gifts for my nieces. It took a little while for me to get the hang of it, but it works like a charm. I didn't have a bag the size I wanted, so I made a couple. The only difference is that I folded strips of wrapping paper to make handles and taped them to the inside of the bag
ReplyDeleteGreat idea and easy to do. I will be making all my gift bags for Christmas, Birthdays & Special Occasions from now on. Love It !
ReplyDeleteJust made one!
ReplyDeleteThank you for theceasy DIY HS
My friend anna told me to check out your blog and here I am really glad that I visited it. Thanks for this great DIY.
ReplyDeleteNice post... IIt is a very original way of doing paper bags
ReplyDeleteJust whipped up one of these for a last minute birthday gift bag! Thank you!
ReplyDelete